Your off grid water system is one of the most essential systems that you will build on your property.
Without access to municipal water, homesteaders must rely on alternative sources like rainwater harvesting, well water, or surface water. Setting up a temporary or permanent off grid water system makes us self-sufficient, sustainable, and saves on water costs over time.
Off grid water systems enable us to gather, filter, and utilize water resources in a way that is both responsible and resourceful.
In this mega article, I will teach you about the different types of off-grid water systems and the equipment you will need to set up successful systems.
Whether you are new to homesteading or looking to upgrade your existing water system, I can guarantee that you will learn something new and valuable in this article that you can incorporate into your off grid water system.
Consider bookmarking this page as this article is over 9,000 words and is a good reference for information with several links to more of my articles that deep dive into individual topics.
Let's dive in!
Part One: Off Grid Water Supply Sources
Each homesteading situation is unique, but we all share one common thread: We need water to survive and thrive!
Although it may not be apparent at first, there are many ways you can provide your homestead with a fresh, steady source of water, and it doesn't have to be a water well. Each water source that I cover has its pros and cons. There are many factors to take into account like water quality, availability, legal issues, and your budget to set up a functioning water system.
In this section, I cover all of the types of off grid water sources, including how to get water without a well.
Method One: Hauling Water
I want to cover this method first because hauling in water from a water depot or local reservoir is a great temporary solution to getting on your land immediately while you are building your permanent water infrastructure.
Some people haul water as their permanent off grid water solution. However, I advise against this as there are several factors that can hinder the operation, including vehicle and equipment breakdowns, reliance on an outside source for water, and not being able to haul enough water to meet your needs over time.
Pros and Cons to Hauling Water to a Homestead
Pros:
- Get started homesteading immediately without setting up a water system first
- Water from a public source is readily available, consistent, and doesn't need filtration
- Hauling your own water is pretty cheap. My cost was $20 for the first 10,000 gallons
- The initial investment is low in comparison to a permanent infrastructure
Cons:
- Hauling water is a big pain, its time consuming and laborious
- You do not have control over the water source and what is being added into the water
- If you lost access to the water source, it could jeopardize your homestead in a big way
- Ongoing costs incur including fuel, vehicle maintenance, or hiring a water delivery service
The Logistics of Hauling Water
There are challenges you must find solutions for when hauling water like where you will get your water from, how you will transport the water, how much water you can transport in one trip, and where you will store the hauled water.
Let's go over each challenge so you can come up with a good game plan.
Where To Get Water for Hauling
My top suggestion is to locate and source water from a local water depot, most rural areas have one. You can call your local fire department to find a water depot in your area.
I hauled in my water for about six months when I arrived on my homestead. I was fortunate enough to have a water depot only seven miles away from me that was available 24/7. They only treated the water with a bit of chlorine so the water was good and fresh without much contamination from toxins.

You can also check to see if the local municipal water supply allows you to haul water directly from their water plant. Some do allow water tank fill-ups, some don't.
If there is a local reservoir nearby, you can check to see if you can draw water from it. Many reservoirs allow this for locals. You can dip into natural water sources too, such as a stream, river, or lake. Just check and make sure that is allowed so you don't run into trouble with the law, or don't get caught!
How to Transport Water to Your Homestead
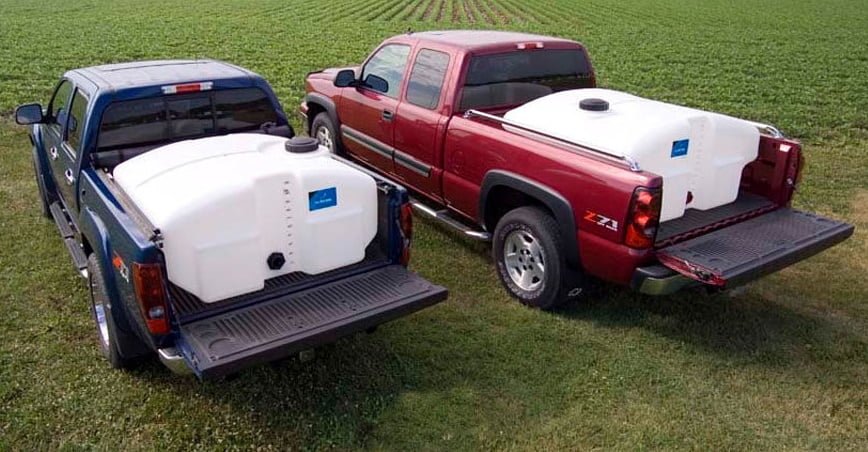
You can either put a water tank in the back of your truck, or get a trailer and put a tank on that. IBC tanks fit well in truck beds, and there are tanks that are specifically designed to fit over the wheelbase of your truck.
I found this low profile 305 gallon tank from Tank Depot that fits perfectly into the bed of a truck. The low profile catches less wind and helps prevent water from sloshing around in the tank. Do note that this is meant to rest on the wheel wells of a truck for support when the tank is full, so only fill it when in the truck bed.
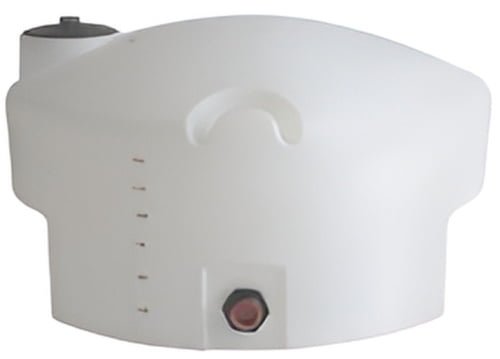
Tank Depot also has a round 200 gallon truck bed water tank for a better price. This type of truck bed tank is more common and also sits over the wheel wells allowing for more capacity. This one is quite a bit cheaper than the low profile tank.
Special Note
Make sure to account for the weight of the water and make sure your truck and trailer are rated to haul the weight.
1 Gallon = 8.03 lbs
For example, a 300 gallon water tank filled to the brim will weigh 2,409 lbs.
I own a 2015 RAM 1500 that has a maximum payload of 2,300 lbs in the truck bed. A 300 gallon tank is a bit too heavy for my small full size truck.
Now, you could fill up your tank with less water, but then the water sloshes around and throws the weight of the water from the front to the back. You can feel the weight of the water being thrown around, especially when hauling on a trailer.
I recommend going with a smaller tank that fits within the weight range of your truck or trailer.
You may choose to haul your water tank on a trailer instead. A utility trailer comes in handy all the time on the property, and will meet many of your off grid needs. You can find good used trailers on Facebook Marketplace, but if you do want to purchase new, I recommend trailers from Tractor Supply, which is where I purchased my utility trailer.

You will also need to pump the water from the hauling tank into a holding tank on your property. You don't necessarily need to do this if your water tank is permanently affixed on a trailer.
I will go over the various pump types that would work for this situation in the "Off Grid Water Pump" section.
Method Two: Build an Off Grid Water System from Creek, Lake, River, or Stream
You may be fortunate enough to have a year round flowing water source right on your property. Maybe you have a pond, access to a river, creek, lake, or stream. You may even be lucky enough to have an artisanal spring on your land! That sure would be nice, but most of us aren't that fortunate.
There are so many factors to consider when sourcing your water from nature. Although this is a great idea, there are pros and cons to the situation.
Pros and Cons to a Natural Water Source
Pros:
- Natural water is very convenient; no need to haul in or drill for water
- Less worry about heavy contaminants and minerals in flowing water
- If the water source is located higher than your homestead, you can build a gravity fed water system
- If you can build close to the water source, there will be less plumbing and pumping
Cons:
- Water source may not flow year around or may dry up
- Water may be cloudy, murky, or stagnant, requiring lots of filtration
- Water source may freeze over during the winter
- Location of water may not be ideal, resulting in lots of pumping and plumbing
Obstacles and Solutions For using an Off Grid Natural Water Source
There are always solutions for every obstacle when living off the grid! That's the fun part, coming up with creative ways for your off grid systems. Here are some ways you can tackle natural water source issues that may arise on your homestead.
Your water source may not be year round. You may have a beautiful creek that runs for the spring and into summer, then dries up in the fall. I suggest that you utilize that water for half the year, and then switch over to a water tank system for the other half. You can fill your water tanks while the water source is still running, and then haul in water for the remainder of the year, if needed.
Water source freezes during the winter. You can use the strategy mentioned above by utilizing the water source for as long as its flowing, then switch to a water tank system when the water freezes over.

Your water has to travel a long way to its destination. You need to calculate how much distance and rise there is from your water source to its destination. Then, you can plan accordingly on what size water pump you need and what size pipe to use.
There are obstacles in the way from the water to the destination. This could be boulders, ravines, dense forest, etc. Try to clear and level a path for your pipe. You want your pipe to run as straight and direct as possible to the source. If not, poly pipe is flexible and can go over and under obstacles.
The water source is murky, cloudy, or stagnant. If this is the case you can still use the water, but you will have to take additional steps to clean up the water for potable use. A portion of the process can be done by digging a sump hole near the water source which will naturally filter out some contaminants.
Steps to Build an Off Grid Water System from a Creek
This method can be applied to any type of natural water source, but creeks are the most common on land (I have one flowing on my property) so I chose this method for the example.
Step One: Dig a sump hole next to the water source. Dig at least three feet down so the water flows in from the source into the hole, creating a moving pool of water.
Step Two: Fill the bottom of the hole with rocks. This prevents the hole from filling in with mud. Then add a layer of sand or gravels.

Step Three: Lower a submersible pump into the hole. This will push water from the pool into your water pipe.
Step Four: Run power to the pump. This could be a series of extension cords or you could even build a small solar setup with a battery.
Step Five: Run water to storage tank. This is the trickiest step because there are several calculations you will need to make to ensure your water will reach its destination. You can always set up a series of pumps and tanks if your water must travel a long stretch. These considerations are:
- Flow rate (GPM): The higher the flow rate, the more powerful the pump, and the farther and higher the pump can push the water.
- Head loss or friction loss: Head loss refers to the pressure loss due to the resistance of water flowing through the pipe. This is influenced by factors such as pipe length, diameter, material, and the flow rate. To calculate the head loss, you can use the Hazen-Williams equation calculator.
- Water pump pressure: The water pressure should be sufficient to overcome the head loss and provide adequate pressure at the endpoint, this includes going up any inclines. This is why I recommend a submersible sump pump instead of a transfer pump because the sump pump pushes water instead of pulling it.
- Pipe diameter: determine your pipe diameter by researching the maximum allowed length based on the PSI of your pump. Here is a thorough water pipe sizing chart that provides you the information.
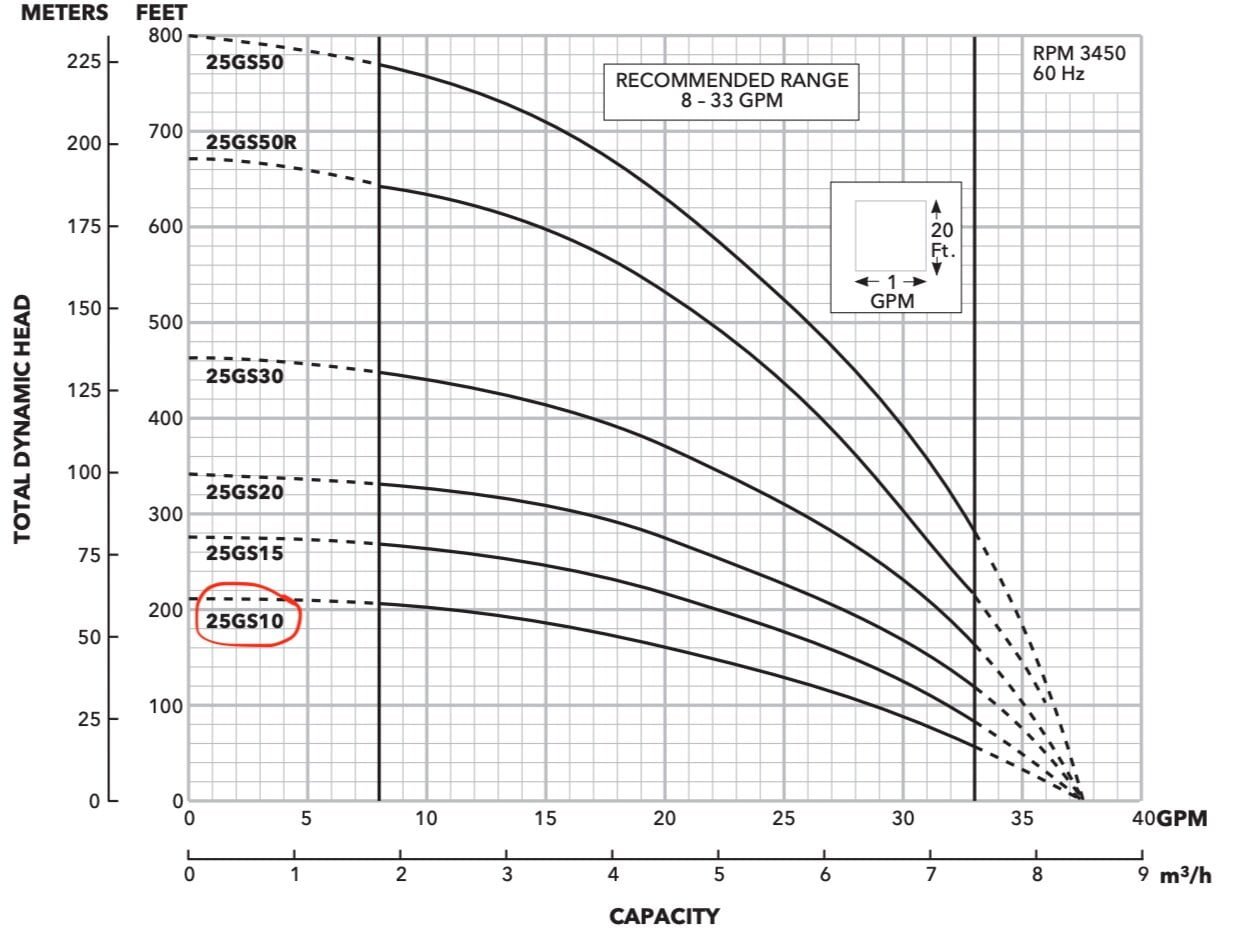
Pro Tip: Your submersible sump pump manual will provide a graph that shows you the amount of pressure it provides at any given head (rise). Here is an example:
Do note that you will need to filter and purify your natural water before use. Read my comprehensive article about off grid water filtration and purification.
Method Three: Off Grid Well Water System
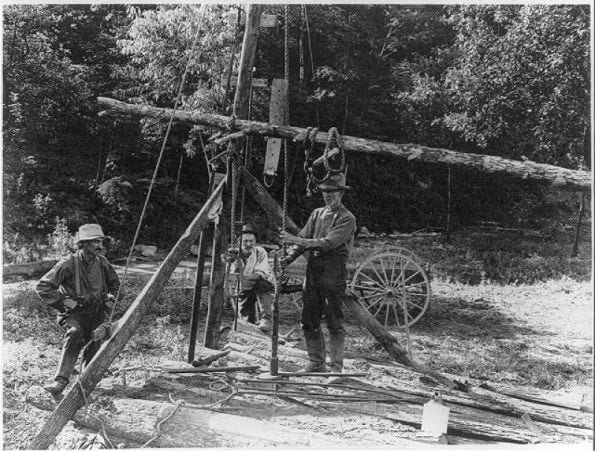
Back in the good ol' days, our pioneer forefathers dug wells by hand using shovels. This was an arduous task, not to mention highly dangerous.
The well was dug to be wide enough to accommodate two men shoveling at the same time. As the men dug lower into the ground, they lined the well with brick or stone to prevent collapse.
They stopped digging once the water was coming in too fast to bail out by hand. Could you imagine!
Although this technique is still doable, there are modern well drilling methods that take all the work out of the equation, thank goodness.
I personally have a well on my property that I acquired when I bought the adjoining property to my main parcel. I was very fortunate to obtain this land, as not only did it have a well, it also has a power pole to provide electricity to my well pump. My well water is delicious and sweet, and my water table is only 60 feet down. My well shaft goes down 240 feet, however.
Although I am very blessed to have such a good well, this is not always the case. There are many drawbacks to using a well as your primary off grid water system.
Recommended Reading: Best Well Water Filtration System
Pros and Cons to a Well Water System
Pros:
- A well can offer consistent water year round for decades to come
- Depending on your region, water from the aquifer can be very clean and fresh
- If you install the well uphill from your homestead, you may not need to add a water pressure tank
- You can choose the location for your well installation
Cons:
- Wells and well equipment are very expensive to install professionally
- Wells need a reliable power source to power the pump
- There can be equipment breakdowns which halt water production
- Well water can be highly mineralized and damage pipes and appliances
- Wells can dry up for no reason with no warning signs
- Your water table may be so deep that it is not feasible to drill a well
If you are choosing to have a well installed, I highly recommend talking to your neighbors about their wells, the depth and charge rate of the wells, and the water quality. You can also do some local research about your aquifer. Local colleges may have this information.
How Much a Water Well Costs to Install
Drilling the well 150 feet deep will cost on average $5,500. Here is a well drilling costs graph illustration cost per depth:

That cost is just for the well drilling. There is also the well equipment costs:
100' of 6" steel casing | $6,000 |
Well pump | $1,500 |
Electrical and control box |
$800 |
Pressure storage tank |
$1,200 |
Switches and plumbing |
$200 |
Total |
$9,700 |
*figures provided by the California Central Valley Flood Protection Board
Well prices can vary drastically according to region and economic climate. More affluent areas will be more expensive to have a well installed.
Hand Pump Well
A hand pump well is a traditional manual method of extracting water from a well without relying on electricity or well pumps. It's a great option for off-grid living, as a hand pump well provides a reliable and cost-effective water supply that rarely breaks down.

If your water table is shallow enough, you can dig or drill your own well for the hand pump. I recommend installing well casing to keep contaminants out and keep the well from caving in.
There are several types of hand pumps, such as pitcher pumps, diaphragm pumps, and deep well hand pumps.
A hand pump well can provide a sustainable and dependable water source for off-grid living, but it requires manual effort to operate. I like the idea of having the hand pump well as a secondary or emergency source of water in case if my traditional well goes down.
Method Four: Rainwater Catchment System
Rainwater is just lovely as it is a soft water and is gentle on appliances. Rainwater also tastes delicious. Installing a rainwater catchment system is a no-brainer for any homesteader as this water source is available in any region, even here in the desert.
In Arizona, rainwater catchment systems are very popular with homesteaders as we get an excellent monsoon system for several months. If you hike into the mountains, there are several old rain catchment systems that the old timer ranchers put in for their cattle. Their catchment systems consisted of corrugate metal panels that were placed on a slope. at the bottom of the panels is a catchment gutter that guided the water into a large concrete water tank. The water tank then filled the cattle water trough.
Pros and Cons to a Rainwater Catchment System
Pros:
- No demand on your local water table
- Free and renewable water resource
- Rainwater is free of hard minerals, chemicals, and contaminants
- Rainwater is soft and delicious, and can be used for any water application
- Catchment systems have no moving parts and are easy to maintain
Cons:
- Water supply is inconsistent in most regions
- There is an upfront cost involved for equipment, storage tanks, and collection system
- You will need a large space for water catchment and for large water storage tanks
- Water needs to be treated for potable use, mainly due to bugs, dirt, and rogue bird turds
I think a rain catchment system is a great idea for a secondary source of water, and also as a backup emergency water method if your primary source goes down.
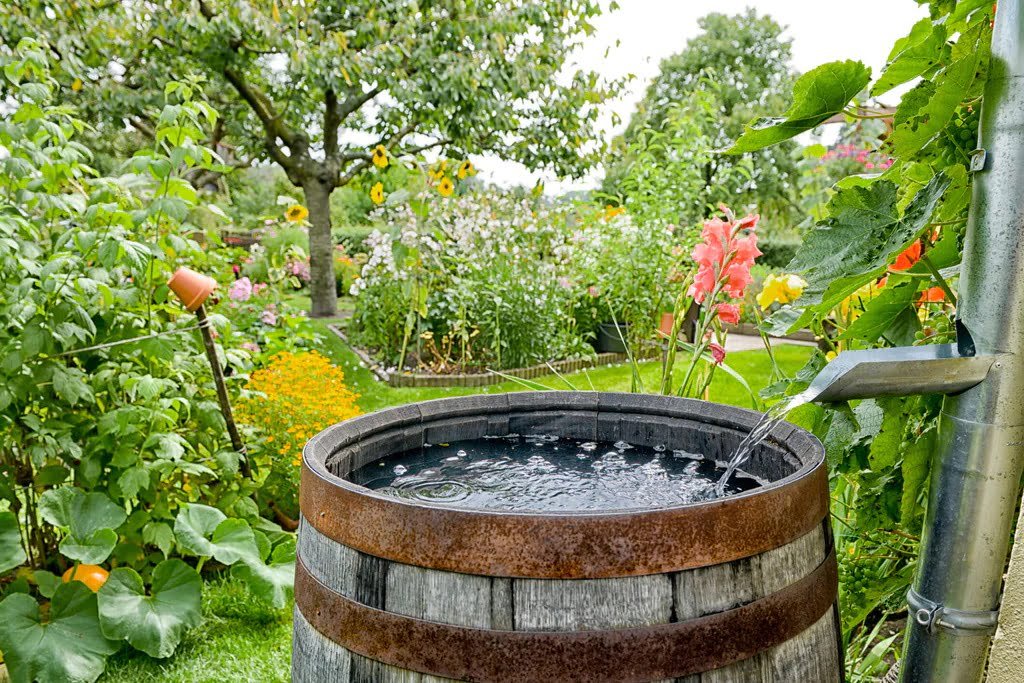
Rainwater Harvesting Equipment and Components
Here are the critical components to setting up an efficient and effective rainwater harvesting system.
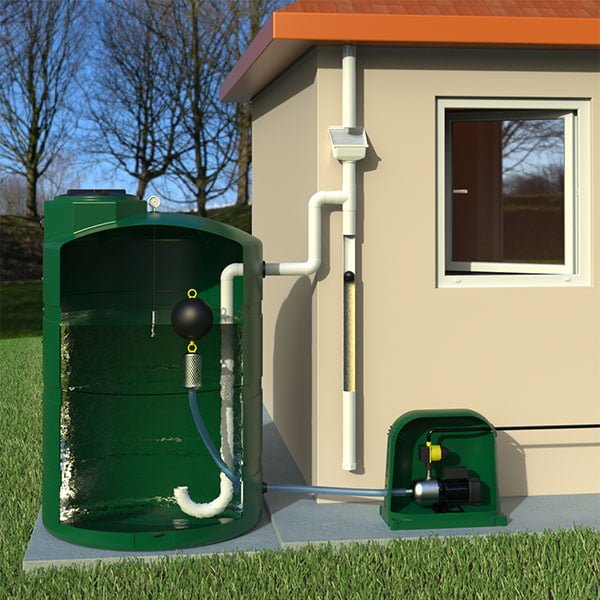
Rainwater Catchment Area
Typically, homesteaders use their roof to catch the rainwater. However, you can set up an area on your property with corrugated metal sheets tilted at an angle to catch water, just like the old timers did. This works best on a slope so the water runs downhill into the storage tank.
The larger the catchment area, the more water you collect. Try to use materials that are non-toxic and resistant to corrosion for your roof or catchment area for better water quality.
Gutters and Downspouts
Install gutters along the roof or catchment area edges to move the rainwater towards the downspouts. The gutters need to be gently sloped to facilitate water flow, and make sure your gutters stay free of debris. The downspouts then channel the water from the gutters to the storage tanks or filtration system.
First Flush Diverter
A first flush diverter is optional but highly recommended as this component diverts the initial flow of rainwater away from the system, which contains contaminants, debris, and rogue bird turds from the roof. This "first flush" of water is directed away from the storage tank, and the cleaner water that follows is collected for use.

Rainwater Storage Tanks
You will need tanks to hold the rainwater. These are typically 55 gallon food grade plastic barrels. You can use several barrels to fill with the rainwater, then pump the full barrels into a larger water storage tank. Your tank will need an overflow management system for when the barrels get full.
Rainwater Filtration and Purification
Although untreated rainwater can be used for irrigation, flushing toilets, and other non-potable uses, you will need to treat the water for drinking. You can run the rainwater through a simple inline hose water filter, then purify your drinking water with a gravity fed water filter.
I recommend the Big Berkey countertop water filters for drinking water purification. It contains no moving parts and uses gravity to drain the water through fine ceramic filters that capture both bacteria and viruses. I wrote this article about the best gravity fed water filters available,

Rainwater Catchment Kits for Sale
I have done a lot of research on the best rainwater harvesting systems for sale, and I highly recommend RainHarvest. The company specializes in rain catchment systems and has everything you could ever need for rain harvesting. They also offer complete systems with all matching components. RainHarvest has kits ranging from under 1,000 gallons for residential use, all the way up to 20,000 gallon fiberglass kits for commercial and industrial use.
Part Two: Off Grid Water Pumps
Unless you have the most ideal layout on your property for using a gravity water system, you will need water pumps to move water to its destination throughout your land. I use several water pumps on my property, including transfer pumps, submersible sump pumps, and of course my deep well pump.
In this section, I will guide you through the many off grid water pumps you can utilize for your homestead. This is divided into two sections, well pumps, and utility pumps. I also wrote an article about building an off grid water pump system, if you want to check it out.
Section One: Off Grid Well Pump
Water wells are the most common type of off grid water system, so let's talk about the many types of pumps that you can use with your well.
Deep Well Submersible Pump
The deep well submersible pump is a cylindrical pump that is designed to be fully submerged in water. These types of pumps are made of stainless steel and push the water with an impeller from the well, as opposed to suction, which makes them more efficient.
Deep well pumps require minimal maintenance and do not make any noticeable noise since they are deep underground in the well.

Hallmark Industries offers a 1HP deep well submersible pump that provides 30 GPM flow rate. Here is the product link.
Shallow Well Jet Pumps
This type of water well pump is mounted above the well and uses suction to pull water up from the well. These pumps are made for shallow wells.
Since these pumps use suction to pull the water, they are not as efficient. They are also noisy and are more prone to breakdowns than the submersible well pump.

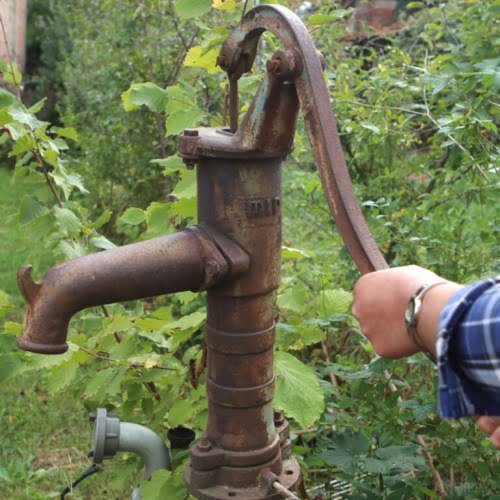
Hand Well Pump System
As discussed in the previous section, hand well pumps are a manual way to pump water which is great as a secondary water source or for emergency use. They also do not rely on electricity which is a big plus, so you can install this type of well pump technically anywhere.
However, they don't really work well for automatic water systems because you have to manually pump them in order to get water. I wouldn't mind doing so for certain things like filling water troughs or watering the garden, but for household use it would become a pain.
Special Note on Solar Well Pump Kits
You will find kits that come with a complete solar power setup along with a well pump. I don't recommend these kits because the well pump is not of a high quality. If you need to use solar to power up your off grid well, all you need to do is build a small solar system by your well house, and use an inverter to turn your DC power into AC power for your well to run. You will need a couple of backup batteries for your solar system.
If you do use solar for your well, I highly recommend having a water storage tank system so you have backup water if your solar power goes down or the sun decides to hide for several days.
Emergency Well Pump System
There are emergency pumps that you can use if your well pump or electricity goes down. This is more for peace of mind as opposed to regular use, but it can get you by in a pinch. These are pretty expensive, however. Here is the product link if you want to check it out. I prefer having backup water on my homestead for emergencies.

Section Two: Utility Pumps
Utility pumps are used to move water from one place to another. These types of pumps are important for homesteads in situations where a standard plumbing system is not ideal. Utility pumps come in a variety of types and sizes, and can be either submersible or non-submersible.
Utility pumps are used for a wide range of applications, including draining flooded areas, transferring water between containers, filling water tanks, or for irrigation systems. Here is a list of the most commonly used pumps for off grid installations.
Submersible Pumps
Submersible pumps are placed directly in water. These pumps are more efficient than other types of pumps because they push water rather than pull it, which reduces the risk of cavitation (the formation of bubbles that can cause damage to the pump).
Submersible pumps can be used for many applications on the homestead, including pumping water from wells, ponds, and pools, draining flooded or low lying areas, or for using in water storage tanks. Submersible pumps are also used for irrigation systems.
If you need to move a lot of water in a short amount of time or over a long stretch, I recommend the Wayne Water Bug. Wayne is well known for their quality water pumps and this particular submersible pump can suck water all the way down to 1/16 of an inch and pushes 1350 GPH!

Transfer Pumps
The primary use of transfer pumps is to move water from one place to another. This is good for transferring water from water hauling tanks to water storage tanks, moving water through a filtration system, or for irrigation systems.
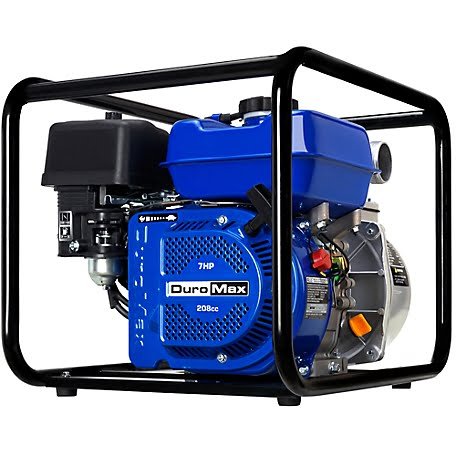
Transfer pumps can be powered by either electricity or gas. Gas pumps are handy because you can move them around your property freely as they do not need to be connected to a power source. They also provide mega amounts of waterflow for moving water very quickly. They are pretty expensive but work well in many homestead water situations.
This Duromax is a nice find from Tractor Supply. This gas powered pump can move 158 GPM with a 2 inch inlet and outlet.
Electric pumps require AC or DC electricity and are smaller in size, power, and price. I use a DC water pump for my drip irrigation system that is connected to a battery which is fed by solar power. DC water pumps can technically be portable if you drag along a charged battery with it.
Shurflo makes an excellent DC water pump that flows at 3GPM at 55 PSI. You can hook it up to a battery and use it anywhere.

Trash Pumps
Trash pumps are a utility pump designed to handle water containing solids or debris, such as leaves, sand, or pebbles. These pumps are commonly used in construction sites, municipal wastewater treatment plants, and flood-prone areas where large volumes of water containing debris need to be moved quickly. These can come in very handy on the property for draining low lying areas, ponds, and water tanks.
Trash pumps use centrifugal force created by an impeller that spins rapidly, causing a vortex that pulls in the fluid along with the solids or debris. The fluid and solids are then forced through a discharge outlet.
One of the advantages of trash pumps is their ability to handle solids or debris without clogging. However, they are not as efficient as other types of pumps, and require more frequent maintenance due to their exposure to abrasive materials.

This 28 lb trash pump can suck debris up to 3/4 of an inch and has 2/3rds horsepower.
In conclusion, water pumps will be a necessity in your off grid water system design. I suggest having at least a transfer pump handy for moving water as you need to.
Part Three: Off Grid Water Tank System
Water tanks are not a required featured of off grid living, but they sure do come in handy. I like to store 1,000 gallons of water at any given moment just in case my well breaks down, or if there is a fire. I at least have a fighting chance of exterminating a fire since I have emergency water backup.
There are several reasons why you may choose to make a water tank system an integral part of your off grid water system. Some folks choose to fill up a large water tank they draw off of instead of taxing their well pump all the time. You may need a water tank if you are choosing to catch rainwater or have seasonal water flow.
There is a special type of tank that you will need for creating water pressure, which I would like to discuss now.

Off Grid Water Pressure Tank System
A water pressure tank is an essential component of a well water system or water tank system and is designed to regulate the water pressure from the water source to the plumbing system.
The pressure tank contains an air-filled bladder that maintains the water pressure and prevents your well pump or submersible pump from cycling on and off too frequently.
When a water fixture in the home is opened, the pressure in the tank drops, and the pump turns on to replenish the water supply and bring the pressure back up. As the tank refills with water, the air bladder compresses, maintaining a constant pressure for the plumbing system.
Calculating Water Pressure Tank Size
It is important to properly calculate the size of pressure tank you need to match your water usage.
The general rule of thumb when it comes to sizing a water pressure tank is that bigger is better. You can never have a pressure tank that is too big. The bigger the tank, the less cycles the pump has to kick on, so it will increase the longevity of your well. The only drawback to a bigger tank is that it physically takes up more space and costs more.
Flow Rate - The flow rate is the gallons of water your pump produces per minute. Your pump manufacturer will provide the GPM, but this can vary based on your well recharge rate, so have your well installer give you an estimate of what your flow rate is.
Minimum Runtime - This is how long it takes for the pump to achieve the desired drawdown capacity. Determine the runtime based on your pump flow rate:
- 0 – 10 GPM flow rate = 1.0 GPM run time
- 10 – 20 GPM flow rate = 1.5 GPM run time
- 20+ GPM flow rate = 2.0 GPM run time
Pressure Switch Setting - This is the pressure needed for the pump to turn on and off. Pressure tanks have three PSI settings: 20/40, 30/50, and 40/60. The low number is the pressure needed for the pump to turn on and the high number is the pressure needed for the pump to turn off. Your tank manufacturer will provide you with a chart to select the appropriate pressure setting.
Tank Size Calculation - now you can enter these numbers into the pressure tank equation to figure out your needed drawdown capacity.
Minimum Run Time x Pump Flow Rate = Drawdown Capacity
Example: 20 GPM flow rate x 1.0 GPM run time = 20 gallon drawdown capacity
Drawdown - This refers to the reduction in volume within the pressure tank as the plumbing system uses the accumulated pressure. The main purpose of a pressure tank is to sustain pressure in the system and alleviate the workload on the pump. By doing so, the pump does not have to operate continuously to maintain the system pressure.
Here are the drawdown tank volumes for available pressure tank sizes:
- 20 gallon tank = 6 gallons drawdown
- 30 gallon tank = 9 gallons drawdown
- 50 gallon tank = 14 gallons drawdown
- 85 gallon tank = 25 gallons drawdown
- 120 gallon tank = 36 gallons drawdown
Therefore, a pressure tank with a 20 gallon drawdown capacity means you need an 85 gallon water pressure tank.
WaterWorker makes the majority of pressure tanks here in the USA. They make a good quality tank, that is actually the brand that I have with my well system.

Different Kinds of Off Grid Water Tanks
There are several types of water tanks that can be used for off grid installations. Tanks vary by style and material. The different materials that water tanks can be made of are:
- Plastic water tanks - affordable, lightweight, easy to install, and resist corrosion and rust
- Steel water tanks - robust, durable, and can withstand extreme weather conditions
- Concrete water tanks - heavy and can be expensive, but are extremely durable and long-lasting
- Fiberglass water tanks - lightweight, easy to transport and install, and resist corrosion
- Bladder water tanks - flexible and can be easily transported and installed
- Polyethylene water tanks - resistant to UV radiation and can withstand extreme temperatures
IBC Tanks
IBC tanks are a food grade tank that is used in the food industry for consumables like oil and sauces. IBC tanks are easy to move, load and transport. I like IBC tanks because once I empty them I can move them around quite easily on the property. I currently own four 320-gallon IBC tanks, two I use for my garden and two I use for water storage.
You can find used IBC tanks all over the internet. I found mine for $150 on Facebook Marketplace. Make sure that if you are buying a used IBC tank to get a food grade tank. Non-food grade tanks were used at one point to store chemicals and are not made with food grade plastic.

Plastic Barrels
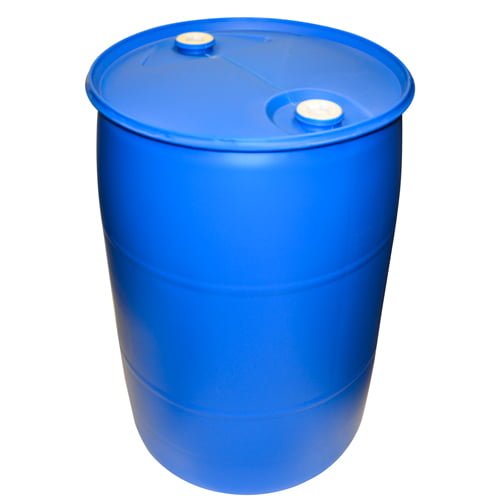
These 55-gallon plastic barrels are excellent for so many off grid applications. I use these in my garden for container gardening. I also use one to mix up my liquid fertilizer in. You can use them for rainwater harvesting, storing water, and even storing dry foods.
These are also very easy to find used online. I found mine for $20 a piece, but many places offer them for free, like bakeries and cleaning companies. Try to get the blue barrels as these are made of food grade plastic.
Above Ground Tanks
Above ground tanks are your standard water tank that sits on a flat surface like a concrete pad. Above ground tanks come in many shapes, sizes and styles and are composed with many different kinds of materials. Although above ground tanks are convenient, they can freeze if you live in a cold enough climate, so take precautions to ensure your water tank doesn't freeze solid over the winter!
How to Keep Your Water Tank From Freezing
- Install a tank heater into the water tank
- Use a water tank heat blanket
- Build housing around the tank and control the climate
- install a below ground tank
Below Ground Tanks
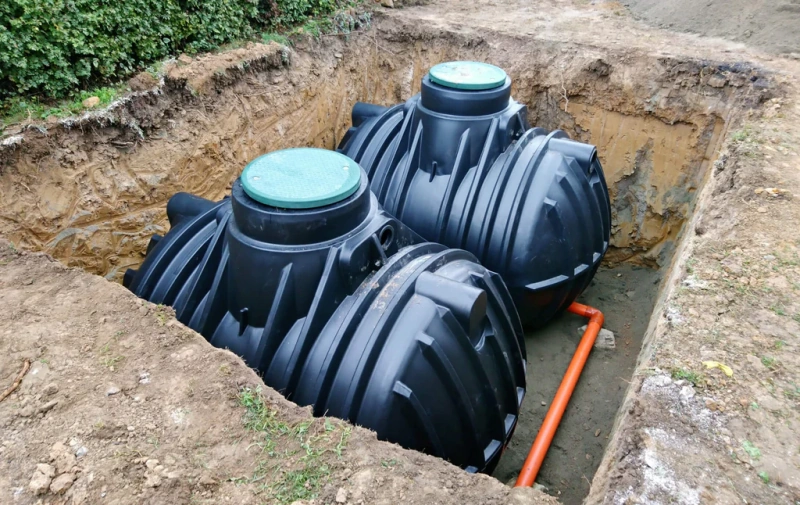
There are many benefits to installing a subterranean water tank. This is an ideal option for frozen climates, you will not have to worry about keeping your tank from freezing, as long as its buried underneath the frost line. You do need to take great care that the plumbing going to and from the tank doesn't freeze, however.
Since these tanks are underground, they don't take up surface space. I don't recommend driving over where the tank is buried.
The tank is protected from the weather such as sun, heat, freezing, and wind. This means the tank will last longer than above ground tanks. They also will be less susceptible to growing mold and algae.
Check with your water tank manufacturer for the maximum installation depth. The tank can only be buried so deep to withstand pressure from the dirt. If you install it too deep, your tank can literally crumple from the weight of the surrounding dirt!
Again, I have to recommend Tank Depot for their MASSIVE amount of above ground and below ground tanks that are available to ship within 48 hours. They have every possible tank you could ever want, so I suggest visiting their website and checking out their inventory.
A quick note about off grid water tanks: you will have to clean them periodically about once a year. I clean mine with white vinegar and a mop, and a pressure washer. This tends to keep my IBC tanks clean for about a year.

Part Four: Off Grid Sewage Systems
It is highly critical for you to set up waste water management systems on your homestead so you don't contaminate your soil and groundwater. This includes managing your greywater too. In this section, I will go over the basics of how to manage your wastewater in relatively easy systems.
Off Grid Greywater Systems
Greywater consists of all the water a household uses minus the toilet. Laundry, dishes, showering, and sinks are all considered greywater. You can reuse treated greywater to irrigate your garden or for toilet flushing.
Greywater is not harmful to the environment but it does require some sort of treatment plan. You can run your greywater onto the ground but it will get stinky over time as food and particulates accumulate. It is non-toxic to the environment unless you are using harsh cleaners.
You can reuse filtered greywater for a small selection of non-potable applications, such as watering trees and landscape, and for flushing toilets. You do not want to use greywater for direct watering of your edible garden.
There are a couple of methods for treating greywater that are easy and feasible for most homesteads.
Constructed Wetlands
You can build an ecological wetland from your greywater! I think this is such a cool idea because you can have a lush little piece of land on your property, even if you live in the desert. This little ecosystem will digest your greywater quickly and safely in a shallow, vegetated basin.
The way the constructed wetland works is by allowing the plants and microorganisms to consume the nutrients of your greywater, including biological contaminants and food debris. The harmful bacteria turns into good bacteria and becomes a harmonious ecosystem that provides wildlife habitat.
The only drawback is that you need to be in a milder climate for the wetland to continue to work. If your wetland freezes over, the digestion of nutrients will cease. You can also use constructed wetlands to treat sewage but I am a little leery of that due to odors and high bacteria content. Its been done for years, however.

Greywater Filtration System
A greywater filtration system is a cheap and easy way to treat greywater before using it to water plants and trees. This removes the larger debris and some of the bacteria.
There are many ways to build a greywater filter which consist of a container that you run the greywater through. The container has materials layered into it, from large coarse materials to fine materials. The materials could be rock, wood chips, gravel, sand, and even activated charcoal to help remove bacteria.
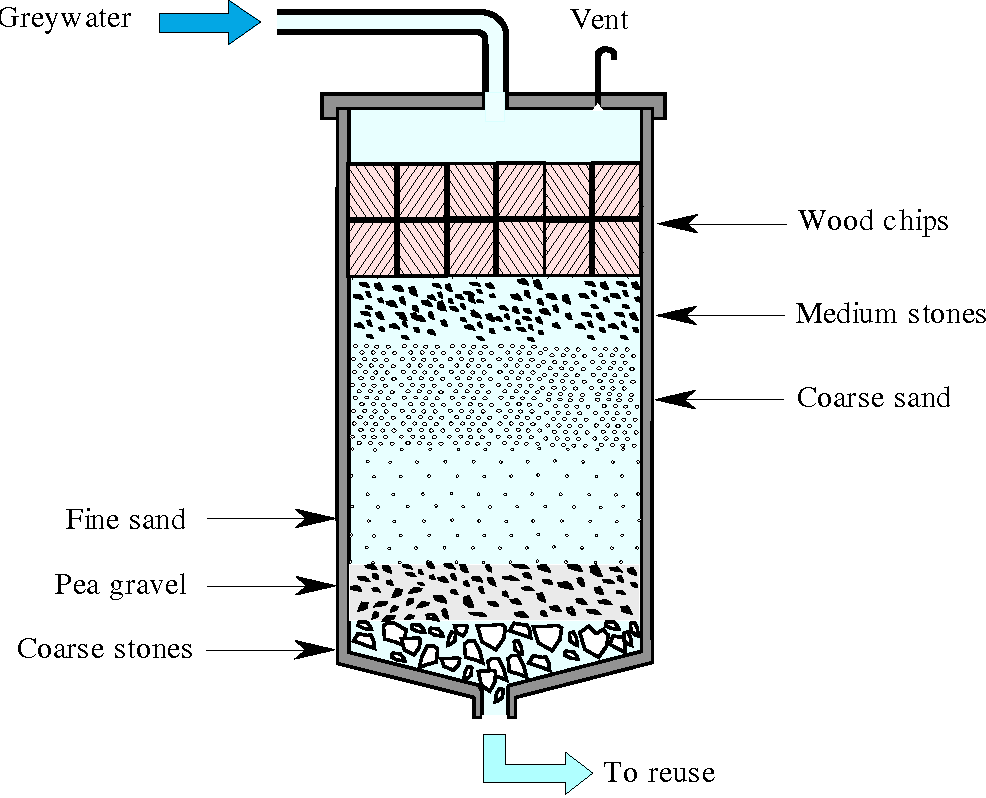
Once you have built your filtration container, you need to source it through irrigation pipes and channels to the endpoint, which is typically trees and landscape vegetation.
Make sure to use greywater best practices for reuse:
- Do not use any harsh chemicals or cleaners, switch over to natural cleaning products
- Separate your greywater from blackwater in a completely different distribution system
- Minimize contact of greywater on foliage with drip systems or subsurface watering
- Don't store greywater for long periods of time as it will grow bacteria and get stinky
Off Grid Blackwater Sewage Systems
Sewage from humans and animals is highly toxic and can contaminate groundwater and plants so it must be handled in a safe manner. Do not dump sewage straight on the ground ever. And even dumping it in a pit untreated is not the best idea. You will need to have a sewage management plan or your property can end up a toxic dump.
Luckily, there are several options for treating your sewage on your homestead!
Build a Septic System
This is a more common way to treat blackwater in rural locations that don't have access to municipal sewage systems. Essentially, you bury a water tank underground, which is known as the septic tank. The solid waste sinks to the bottom and the effluent (which is the liquid) flows out of the septic tank into a distribution box. That box then evenly distributes the liquid into a drain field.
The drain field is comprised of underground gravel beds. Mother nature then takes care of filtering bacteria and viruses, making it safe for the environment.
You will have to replace the septic tank every 20 to 30 years and the tank will need to be pumped to remove the sludge every five years or so, depending on usage.

Biogas Digester
These modern, yet simple systems breakdown the organic waste into fertilizer and captures the methane gas released in the process. Both of these byproducts can be reused on the property.
A biogas digester consists of an airtight container, often referred to as the digester or reactor, where anaerobic digestion takes place. Organic waste is fed into the digester, and in the absence of oxygen, microorganisms break down the waste, producing biogas (primarily composed of methane and carbon dioxide) and nutrient-rich slurry or digestate.
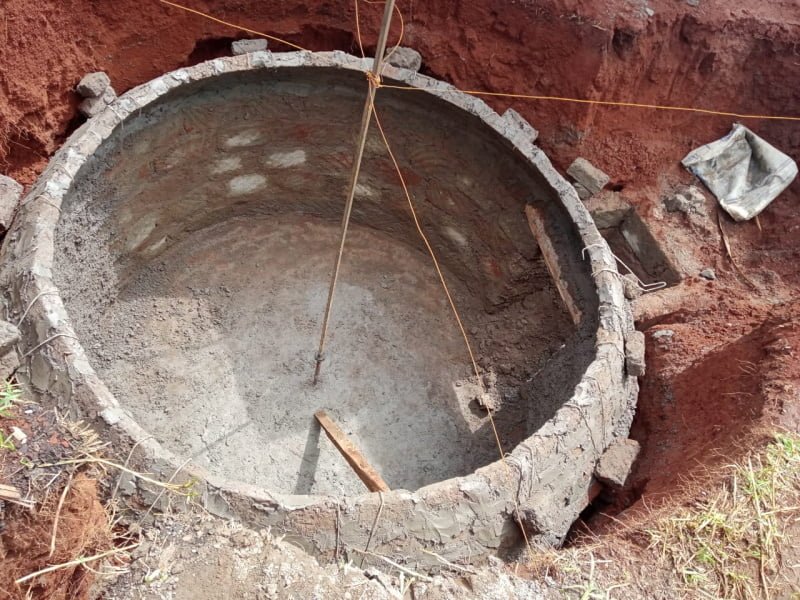
Biogas digesters don't need to be expensive or complex. There are many styles of digesters, a simple one being the fixed dome digester. This is a permanent, dome-shaped chamber made of brick, concrete, or other sturdy materials. The waste is fed into the chamber, and biogas accumulates in the upper part of the dome. The gas pressure forces the slurry into an outlet chamber, where it can be removed and used as fertilizer. These are popular due to their low cost and simple construction.
Composting Toilet
You can remove the blackwater system completely from the equation with a composting toilet system!
Composting toilets work by utilizing the natural decomposition processes to break down human waste into compost. Aerobic microorganisms, which require oxygen to thrive, are responsible for decomposing the waste material. To create an optimal environment for these microorganisms, the toilet needs to maintain the appropriate balance of moisture, oxygen, and temperature.
Once the microbes have completed the composting process, you have a clean rich fertilizer to use in your garden.
Although this is an effective way to reuse your waste safely and efficiently, composting toilets are expensive and they do require maintenance to keep them in good working condition.

This is the Nature's Head composting toilet. It has a urine catcher, hand crank to turn the main chamber, and is easy to dump when the compost is ready. I will warn you, this toilet is over $1000. Some people swear by them, but to me, that is a lot of money on a toilet! It does remove the need to build a septic system, so you might find it worth it.
Build an Outhouse
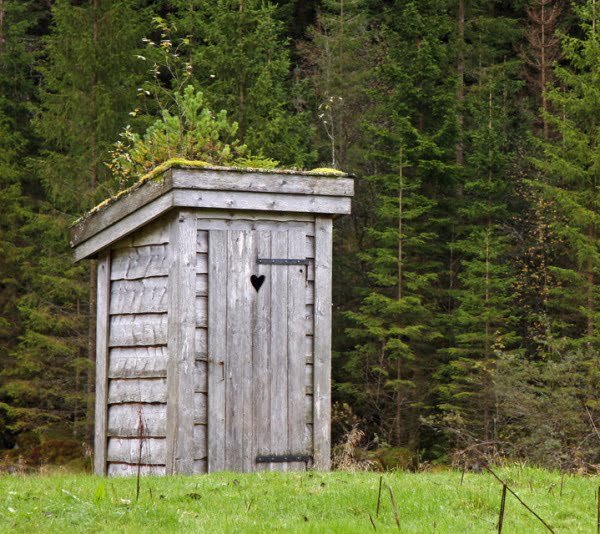
Do it how they did it in the good ol' days and use an outhouse. The outhouse is a simple design that is cheap to build and requires no waste water treatment.
All you have to do is dig a 3 to 6 foot deep cylindrical pit, and then build a portable house over it. Once the pit is full you cover it up with soil, dig another pit and move the house over it. Mother nature takes over and decomposes the buried pit.
They aren't all that convenient, however. If you have to go in the middle of the night you will need to traverse outdoors in the cold, rain, or whatever weather condition there may be. They also get cold and hot in the summer. It is a good choice for a temporary solution while you are building something more permanent and convenient.
Use a Portable Toilet
This is a nifty contraption that is basically a portable toilet that is used in RVs, for camping, in hospitals, and anywhere a toilet is needed on the fly. It even flushes too!
The downside is that you are still creating blackwater and it must be dumped and treated somewhere. But, this can work in a pinch while you are setting up a permanent off grid sewage system.

Use a Bucket
Or, you can do what I do, which is sh!t in a bucket. Yep, I use a bucket and I am not ashamed! Its because its the easiest, simplest way to manage my personal waste. What I have done is purchased a toilet seat bucket lid. I then cut the bottom of the bucket off, and after I have done my business, I dig a hole and bury it. Mother nature takes over from there.
This is a temporary toilet situation that has turned into a long term temporary situation, because I enjoy the fresh air and sunshine while taking care of my business. But, I also live in Arizona which makes it a viable option year around. One day, I will build myself an outhouse. But that day is not today!

Bucket Toilet Seat Lid Product Link
In conclusion, treating greywater and sewage doesn't have to be a big deal when living off the grid. You can install easy systems that are environmentally friendly and affordable.
Part Five: Off Grid Water Heating Systems
Traditional water heaters don't play nicely with off grid energy systems. They either use a ton of electricity which is a highly precious resource, or they use natural gas which is not available to most rural locations.
In this case, alternative water heating methods work very well. These methods are efficient, ecofriendly, and DIY methods cost little to nothing.
I am not going into too much detail in this section, because I have written a lengthy and in-depth article about off grid water heating, so check that out if you would like to know more details about off grid water heaters!
Heating Water Without Electricity
There are four main ways on how to heat water without electricity. These are:
- Propane via propane water heaters
- Heating the water with the sun
- Burning wood in a stove or fireplace
- Using solar power for tankless electric water heaters
Let's go over each one and discuss some ideas around them.
Off Grid Propane Water Heater
This is my favorite way to heat water because the water gets very hot, its consistent, and convenient.
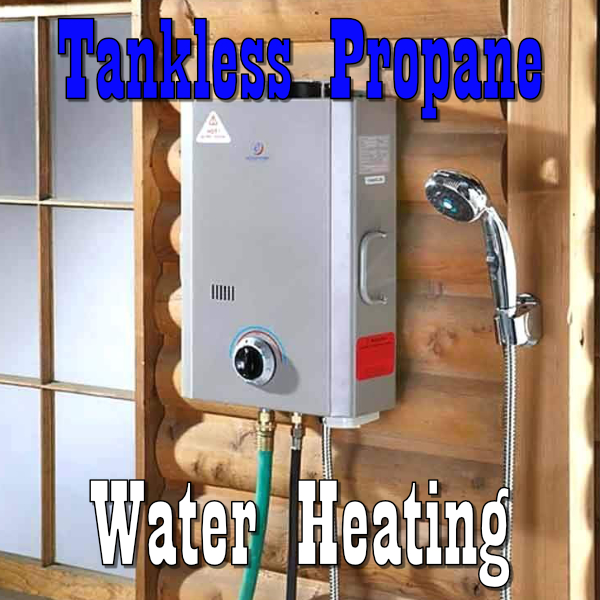
Although propane water heating isn't technically off grid, most rural locations have a propane delivery service or propane depot where you can get your tanks filled, which is what I do. Tankless propane water heaters are highly effective at heating water on demand and don't take that much energy.
I personally use an outdoor propane shower system that is designed for portability and is priced under $200. This could be considered temporary, but I love taking an outdoor shower in the sun and fresh air. I can't compare it to anything else!
I use the Gasland Propane Water Heater which is lightweight, yet highly effective at heating up water for a nice shower.

There are also indoor and outdoor propane water heaters meant for whole house use, which is a permanent installation that needs to be installed by a gas plumbing professional.
Solar Water Heaters
Using the sun to heat up your water is an excellent way to have free water heating. All you need to do is purchase or build the system, and then let that baby bake in the sun. You will have piping hot water, so hot that you must be careful not to scald yourself!
There are two types of solar water heaters: expensive, yet highly efficient manufactured ones or DIY ones that are cheap and easy to build, and are also highly effective.
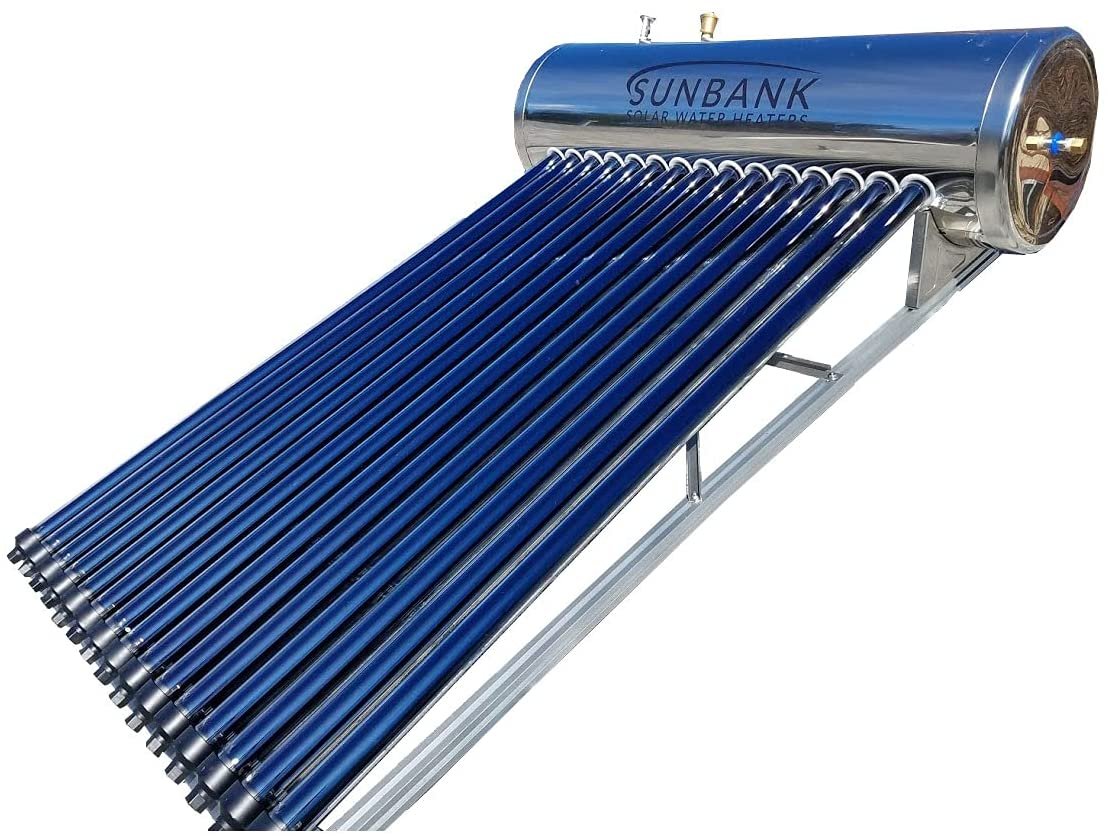
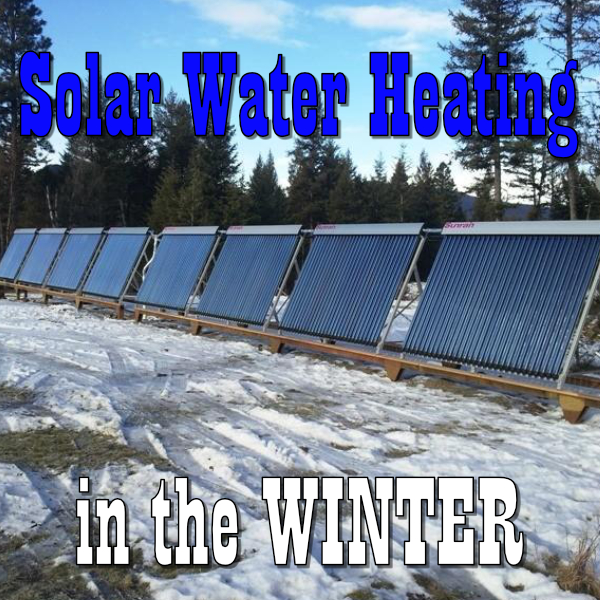
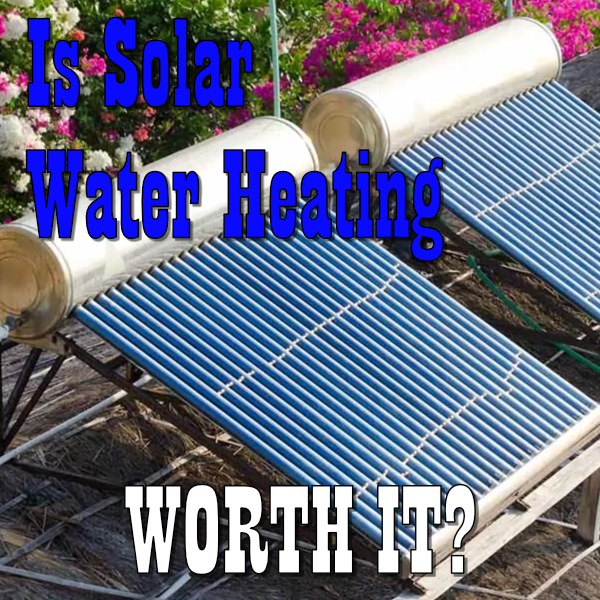
Manufactured solar water heaters use an evacuated tube system that maximizes the solar rays to bring water to practically boiling temperatures. These systems are very expensive, but there are hefty government rebates available. Sunbank offers a high quality solar water heater that is insulated so the hot water lasts all night long. It has a built-in water tank and uses evacuated tubes for maximum efficiency. They are very expensive at over $2,000 but there is a 30% government rebate available and after the initial purchase there is no monthly utility cost.
I suggest building a DIY solar collector because they are so cheap and easy to build. You can then pump your hot water into a traditional water heater that will keep the water warm overnight. Since the water heater doesn't have to initially heat the water, it cuts down drastically on energy usage!

Wood Burning Water Heater
Another great option that you may already have in your cabin is using a wood burning stove to heat up your hot water. What you do is wrap a copper coil around the stovepipe. You then attach the ends of the coils to a range boiler, which is a water tank with nipples to connect to an inlet and outlet pipe. Attach one end to the top of the tank, and the other end to the bottom of the tank.
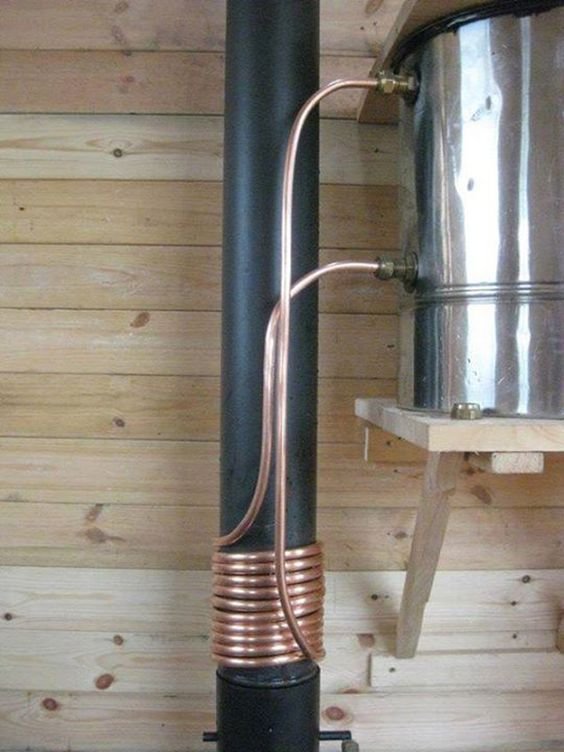
A natural process known as convection occurs. This is when the hot water rises to the top and the cold water sinks to the bottom. The cold water will enter into the lower copper tube and the hot water will exit the hot copper tube, creating its own natural pumping. It's science!
This is an extremely effective way to produce hot water. The only problem is that you need to start a fire in your wood burning stove every time you want hot water. The range boiler will only keep it hot for so long.
Tankless Electric Water Heaters
If you can afford to spend some of your precious solar energy on a tankless electric water heater, then it may be worth it. Traditional tankless water heaters take way to much startup power and will zap your battery bank in the blink of an eye.
However, there have been efficiency improvements in electric tankless water heaters and there are now smaller options that could work with your solar power system and battery bank. You will need to do calculations to make sure your system can handle the battery drain and electric depth needed for this device. I have all the calculations for you in my off grid water heating article.
EcoSmart makes a mini electric tankless water heater that will work for small water heater installations such as a cabin or tiny house. It is an on demand hot water heater so you only use the electricity when its needed. Here is the product link.

In conclusion, there are so many ways you can make hot water on your property that are not reliant on electricity or natural gas. You can choose a DIY method that works tremendously well, or go for a modern and convenient manufactured system. Either way, you don't have to live without hot water on your homestead.
Part Six: Benefits of an Off Grid Water System
I wanted to throw in this section at the end of this article because there are so many wonderful benefits to setting up an off grid water system that will make you excited to build one, just like I was when I started my homesteading journey!
Independence from Municipal Water Systems
When we rely on municipal systems for our water, the situation is beyond our control. I remember back in the day when I lived in a small town and the main water vein went out. I had to haul in water for several days! And for some reason, about once or twice a month, we would lose our water for a day or even two at a time.
I would much rather depend on my own water system than rely on a system that I have no control over. I know exactly where my water comes from, what equipment is being used, the condition of my equipment, and what is going into my water (which is nothing). My water is good, and I am responsible for my water system and source management.
Cost-Effectiveness
Yes, the cost of an off grid water system is upfront and can get expensive, but it doesn't have to be. If you have a wild source of water on your property, you can use that as your water source which is basically free! Wells are expensive, but without any future water bills, it will pay for itself.
Hauling water is also cheap. Water depots are pennies on the dollar in comparison to paying for a monthly municipal water source. You can build a system for pretty cheap with proper planning and reusing of materials.

Environmental Benefits
An off grid water system naturally consumes less if no power at all, unlike the power needed to run heavy duty municipal water plants. If you are catching rainwater or harvesting water sustainably, your impact on water usage is much less than wasteful traditional systems. As homesteaders, we tend to consume less of everything, including water and as this is a precious and valuable resources for us.
Flexibility
The best part about off grid water systems is that you can set them up practically anywhere, within reason. You can use a slope for a gravity fed water system. You can drill a well just about anywhere as long as the drilling rig can access it. And if you haul in your water, you can put your water tank anywhere you desire.
Part Seven: Frequently Asked Questions
How do you keep water from freezing off the grid?
To prevent water from freezing, insulate your water containers, pipes, and storage tanks to minimize heat loss. You can use materials like foam insulation, straw, or fiberglass insulation to wrap around the containers and pipes.
How do I keep my water tank from freezing without electricity?
You can use passive solar heating by designing your water storage system to take advantage of the sun's energy. Use the heat from the earth by storing water containers underground or in a root cellar. Keep the water moving with a small solar-powered pump or a wind-powered aeration system can help prevent freezing. You can also place your water storage near a heat source, such as a woodstove.
How much water do you need to live off the grid?
You need to calculate what your water needs are for drinking, cooking, cleaning, hygiene, and for irrigation or livestock. This will vary depending on factors like climate, lifestyle, and the number of people in your household. On average, a person needs a minimum of one gallon of water per day for drinking and basic hygiene, but this amount can increase to 3-5 gallons per day when considering all water-related activities.
How much does an off grid water system cost?
The cost of an off-grid water system will vary greatly depending on the components, water source, storage capacity, and location. Factors such as well drilling, rainwater harvesting setup, water storage tanks or cisterns, pumps, filtration and purification systems, and other necessary equipment all contribute to the overall cost. On the lower end, a basic rainwater harvesting system with a storage tank and simple filtration can range around $1,000-$3,000, while more complex systems that include drilling a well, using water pumps, and pressure tanks can cost upwards of $10,000-$20,000 or more. Weigh your needs, water usage, and environment when deciding on the right off grid water system for you.
How do you make off-grid water pressure?
Off-grid water pressure can be achieved by using a combination of gravity-fed systems, pressure tanks, and pumps. For gravity-fed systems, storing water in elevated tanks or using hillside locations can create sufficient water pressure. Pressure tanks store water under pressure and release it when a faucet is opened, and pumps can maintain water pressure in the system.
How do off-grid homes get water?
Off-grid homesteads acquire water through many sources like water wells, rainwater, or accessing nearby rivers, lakes, or streams. These water sources are combined with storage tanks for a consistent supply. Homesteaders also filter and purify their water, reuse some water for irrigation, and cut down significantly on hot water to conserve on energy usage.
How does a gravity fed water system work?
A gravity-fed water system works by using the force of gravity to move water from a higher elevation to a lower one. Water is stored in an elevated tank or reservoir and flows through pipes to the point of use as needed. The elevation difference between the water source and the point of use creates water pressure, eliminating the need for pumps or electricity. Gravity-fed systems are simple and don't cost a thing once they are set up.
What is a cistern water source?
A cistern is a water storage container or tank that is designed to hold large volumes of water. Cisterns can be installed above ground or buried underground, and they are used to store rainwater or water from other sources, such as wells, springs, or rivers. In off-grid or rural settings, cisterns are a critical piece of the water system, allowing homesteaders to collect and store water for later use.
In Conclusion
Building my off grid water system was my favorite project on my entire property, besides my garden. I love thinking of ways to move my water, use less water, and recycle water.
I have gone pretty lean on my systems, using used IBC tanks, utility pumps, and hoses to meet my water needs. It doesn't have to be expensive and robust. Just go simple to get your needs met and then build from there.
If you have any questions or comments on this article, please feel free to leave them below, or send me an email via my contact page.
Happy homesteading!

Hi thank you so much for this comprehensive info! We have recently had a well drilled and installed the solar pump ourselves… We were told that usually when rhe pump is installed, they drop some chlorine into the well to disinfect it from the drilling process. That doesn’t make sense to us, and we don’t want chlorine in our water. We have pumped out the well until clear water and We do plan to filter our water before drinking. It sounds to us like that initial chlorine ‘disinfection’ is just a CYA. What are your suggestions or guidance?
Hello, Cat!
Yes, I do suggest doing the chlorine flush when first installing a well. You will want to kill off any antimicrobials that the well stirred up, and it will also flush out impurities, residues, and any lubes that the drilling process used. I don’t like the idea of chemicals either, but when it comes to water, I don’t mess around. And, its only temporary! Do the flush, run the water until that chlorine smell is out of the system. Once you do that, you can move onto more healthier forms of water purification.
Hello There:
So glad I found you. A woman that knows about all this. YAY. Building a tiny house and just found a spot for it with a year round creek. I am excited and scared. Trying to absorb as much information as possible. Just turned 65 so it feels a bit more daunting. Thank You!
Hello! Not many of us ladies out here doing the off grid lifestyle, yay!
I love the idea of a tiny home. I also like yurts, and even teepees, they are so cool.
All you can do is get out there and make it happen. Research is good, but much learning is hands on. I think you will do great.
And for the stuff you can’t do, there are plenty of strong young men you can hire and pay cash to help out. Facebook Marketplace is a good place to find a hand. I bet you could even trade labor for beer lol lol
Good luck in your ventures!
This is so comprehensive. Thank you for that. I printed off everything!
I am so glad you enjoyed my article. Printing is a great way to preserve information if the internet and power were to go down.
Love your site and I’m getting ready to read it again! I have 23 acres of land that is off the grid. I have put up 4 sidewalled tents that I rent out to campers. Hauling in water for my campers to shower and wash is tedious. I do have a 325 gal. plastic water tank that I’m not using. I also dug a hole near a spring which has filled up nicely. Any ideas on how to use this tank to supply water for the outdoor shower? Should I elevate it and use height to push the water out? How do I keep the water tank clean? This water will be for washing only, not drinking but I want it to be safe. Any ideas would be much appreciated.
Hi Judson! Very cool idea with the 4 wall tents, we have been thinking about doing the same. You can use gravity for your water system, 2.31 feet elevation per psi. So 10 psi is 23.1 feet, if you have a hill that would be ideal. You can use a pressure tank with your storage tank, and that would work good, but you will need to run power to it. Keeping it clean… If it is a dark color it won’t form algae, if its light it could get dirty. You may want to add a bit of chlorine to the water to keep the slime away. So glad you love the site! Ty!
I remember being told many years ago if a well has clear eye less crawdads in it the water is pure and good for drinking. The well we used in the Kentucky mountains had those crawdads and no one ever got sick from that water, no taste, smell just clear ice cold water from underground spring. There’s always a bucket for collecting water off the grid to. Been there done that.
That is fascinating and it makes sense to me! We have been drinking our well water with a simple water filtration system and have had no issues.
hi Regina. i have lots of fire wood available and wanted to find a method of heating water for heating and hot water in an outside wood fired heater. any suggestions? i was thinking of using an old wood fired stove and oven. but not sure about how to retrofit it. david
I would go with the copper coil method as shown in the article, so all you really have to do is attach the coil to the back of the heating chamber. Should work really well!
you impress me with your down to earth approach. God bless you
Thank you and God bless!
This is EXACTLY what I was looking for! Thank You So Much!
Ah, I am so glad you found my article helpful! You are very welcome.
Your picture of “septic system diagram” in your article and multiple boxes just below your name all have “?” in a blue square. My guess you have more that have these. I am not familiar how Pinterest does things like that.
Thanks for the heads up! I am not having the same issue in my browser…. Maybe your browser is out of date? I would try maybe clearing your cache too.